This method statement describes the method of installation of suspended gypsum board ceiling and tile ceiling in any kind of project or building.
Project manager of the false ceiling subcontractor is overall responsible for the implementation of this method statement and ensure that the supervisory staff allocated for this work and all resources are in place for the successful completion of the project.
The site engineer is responsible to execute the installation work as per the approved drawings and project specifications.
QA/QC engineer of subcontractor is responsible to ensure that false ceiling work has been done as per specification and inspections are done as per the approved ITP and using the proper inspection checklist.
Safety officer of gypsum board ceiling subcontractor is responsible to ensure that all personnel on site are to abide by the project safety requirements.
Tools, Plant & Equipment Requirement
Following tools will be used for installation of suspended false ceiling works.
- Drills with bits for concrete and metal
- Screw gun – Power tool that drives all types of gypsum board screws through gypsum board and into framing or substrate
- Powder-actuated tool ( E.g. Hilti Gun fastener)
- Chalk line
- Sprit level
- Metal cutting scissors
- Measuring tape – A steel retractable measuring tape, usually 25 feet in length.
- Gypsum board T-square –Square edge for measuring and cutting gypsum board to length and for cutting out holes for square outlet boxes and other openings.
- Utility knife – Standard cutting tool with replaceable/reversible blades for scoring and cutting gypsum board.
- Hammer – Drives nails through gypsum board into wood framing.
- Keyhole saw – Small triangular saw for cutting out holes for outlet boxes, pipes, and other penetrations.
- Assorted trowels and taping knives – Bladed tools for applying and smoothing tape and joint compound over joints and fastener heads.
- Tray / Box to contain joint compound while finishing joints and fastener heads.
Manpower Requirement
- False ceiling technician
- Labor / Helper
- Supervisor/ Forman
- Site Engineer
Material Requirements
Following materials will be used for installation of suspended false ceiling works:
- 5mm thick regular gypsum boards
- 600x600x6mm thick calcium silicate tiles
- 55mm thick suspension of framing elements
- T-24 exposed GI suspension
- 0.5 mm thick 600mm x 600mm Aluminum tile
Sequence of Work for Gypsum Board Ceiling Works
Site survey: On receipt of the shop drawings approved by the consultant, the site will be surveyed and any discrepancy found will be notified to main contractor for clarification.
Setting Out
Setting out and marking will be done as per approved shop drawing.
Ceiling height of various areas shall be marked based on the bench mark provided by main contractor.
Level will be transferred on all the corners and chalk lines will be marked.
Fixing of Wall Angles
The wall angles will be fixed along the marked ceiling line depending on the substrate at 600mm to centre spacing.
Before fixing the wall angle the substrate has to receive necessary finishes as per the finish schedule.
Fixing of Hangers
Fixing of hangers will be done as per the approved shop drawing layout details and using hanger anchorage devices of the soffit as per approved material submittal.
The position of the hangers will be marked on the soffit of the slab, which has to be reviewed by main contractor site engineer.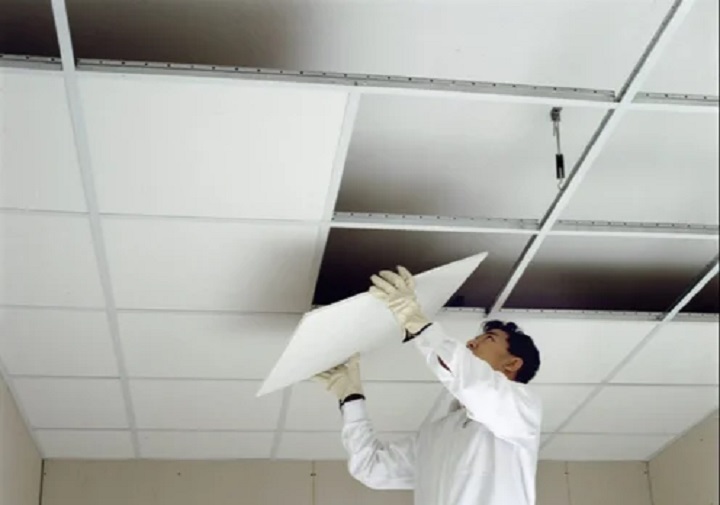
Upon receipt of MEP clearance hangers shall be fixed at a spacing of 1200mm centres on both the directions.
Where MEP services are clashing with fixing hangers, additional supplies shall be provided by agreeing with main contractor on site.
Frame Work
Frame work will be done according to the approved shop drawings and with approved materials.
Framing members such as Main Runners and Furring Channels of 0.55mm thick shall be placed as a spacing of 1200mm and entries respectively.
Heavy recessed fixtures should be independent of the ceiling framing stems.
Frame Work Inspection and MEP Clearance
Upon completion of framework, respective areas shall be offered for main contractor and consultant inspection.
Inspection request will be raised on prescribed formats for first and second fix of ceiling.
Written clearance for MEP and associated works to be obtained at different stages for the uninterrupted flow of ceiling installation works.
Upon receiving the approval and MEP clearance, void closures shall be started by gypsum board installation.
Gypsum boards of specified type (Regular) shall be applied to the framing using gypsum screws at 200mm.
For tile ceiling the void closure will be done by placing calcium silicate tiles on the complete grid work.
Taping and Jointing For Gypsum Board Ceilings
Following coat will be applied over the joints:
- First Coat / Jointing Coat
- Second Coat
- Third Coat
First coat is initial jointing process where the fiber tape is fixed over the thin joining compound applied over the joints.
Another layer of jointing compound application would be done over the tape.
This would be approximately 75mm wide.
Screw heads also will be covered by the application of the joint compound.
Second and third coat will be applied successively after having dried the previous coat.
Each successive coat to be feathered 40mm beyond the previous layer sides of the joint.
This would be sanded smooth after drying and leave for receiving decoration by other trades.
Final Check Up
On completion of taping, jointing and sanding subcontractor supervisor will check the level and make sure that is in true level and the work is within the tolerance limits.
Cleaning and Handover to the Main Contractor
When all activities related to gypsum board false ceiling are complete, the area will be cleaned thoroughly.
Once the cleaning is done and approved, subcontractor’s site in-charge will raise a “Request for inspection” to main contractor for their acceptance to issue the substantial completion of works certificate.
After that the area will be handed over to main contractor or the succeeding contractor for further finishes / decoration as applicable.
Discover more from Method Statement Store
Subscribe to get the latest posts sent to your email.