Below is a precise method statement that covers the formwork procedure for construction of shear walls.
Kicker Form Assembly Procedure
Upon completion of concreting of floor slab, all wall positions will be marked.
Kicker forms are set according to the marked position of the wall.
Kicker forms shall be secured to the floor slab properly.
Timber planks and concrete nails will be used to fix the kicker forms if necessary.
Kicker stop ends and kicker clamps are used to control the thickness of the walls.
Concreting will be proceeded.
Wall Formwork Assembly Procedure
Before placing the wall forms in its final position, all reinforcement and service conduits are in position.
The first wall form is lifted off by crane and placed in its position against the kicker, with lapping of 20mm.
Form ties, spacer cones and stop ends are placed on to the forms.
The second wall form is lifted off by crane and is positioned face-to-face with the first wall form.
Both wall forms are connected by form ties, washers, and wing nuts.
Leveling of the wall forms by adjusting both jacks at the base of wall forms and trusses support.
Adjusting the wall forms verticality by adjusting the wall form stand jacks.
Use the magnetic plumb bob hanging from about 3 meters height on the wall form external and check the dimensions at the top and bottom of the wall form.
A string will be placed along the wall from end to end for checking of horizontal straightness between the wall panels.
Tighten up the wing nuts.
Concreting will be proceeded.
Wall Formwork Dismantling Procedure
Wing nuts are loosened and removed. All washers and form ties are also removed.
Block-outs locking bolts are dismantled.
Wall stop ends are loosened.
Lower down both jacks to allow the wall form to drop its weight and rest in tilted backward position.
Wall form is then lifted off by crane and placed in its next position for the following phase of casting.
Shear Wall Formwork Method Statement with Illustrations
Kicker’s preparation along the wall marking position after reference point given by surveyor and offsetting by us.
Any starter bar out of alignment will be rectified by the bar bender prior to casting of concrete.
Rebars setting as stiffener to be done at wall edge.
BRC setting is tied to starter bar.
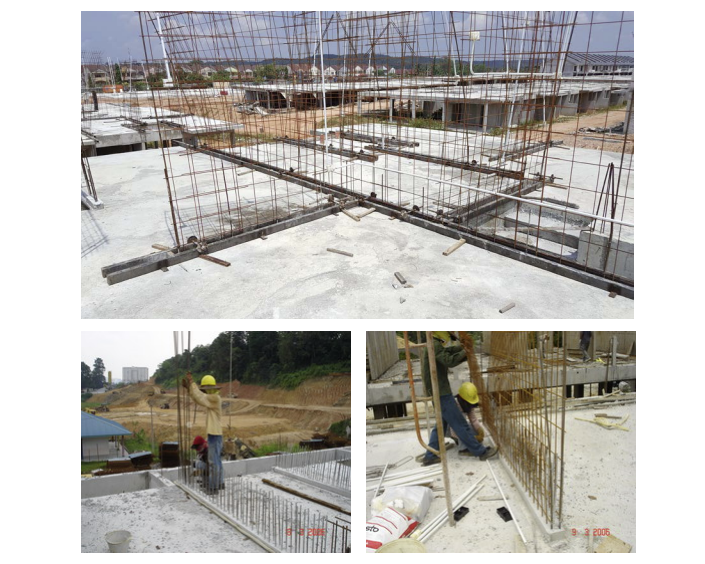
Mechanical and electrical work including the installation of electrical conduits to be done.
Striking & transferring of wall form to be completed.
Spray the mould oil for easy striking.
Place taper cones & tie-rods.
Complete setting on 1st Half wall panel.
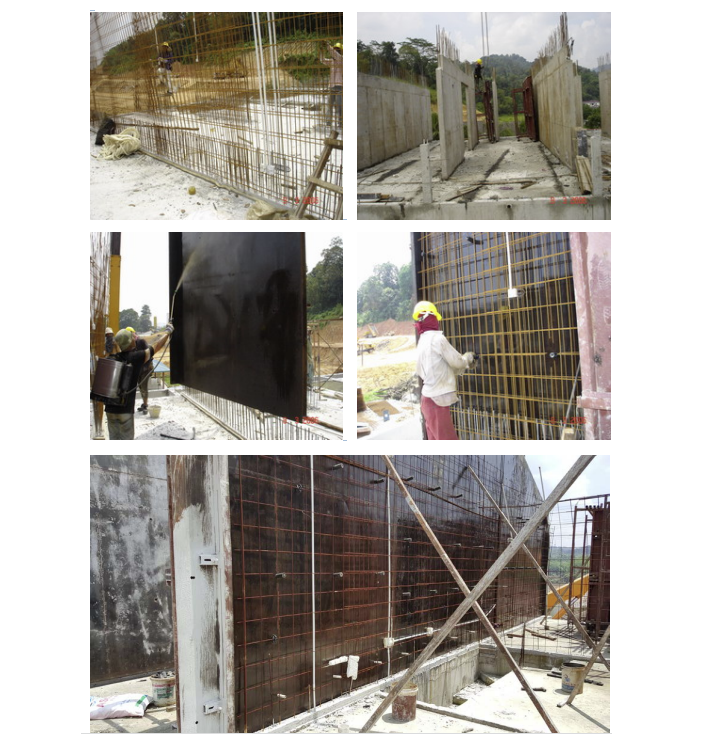
Now complete the installation of box-out frames (if any).
Tighten the bolts & nuts on box-out.
Transferring the 2nd half of wall panels to be done.
Lower and close up the panels.
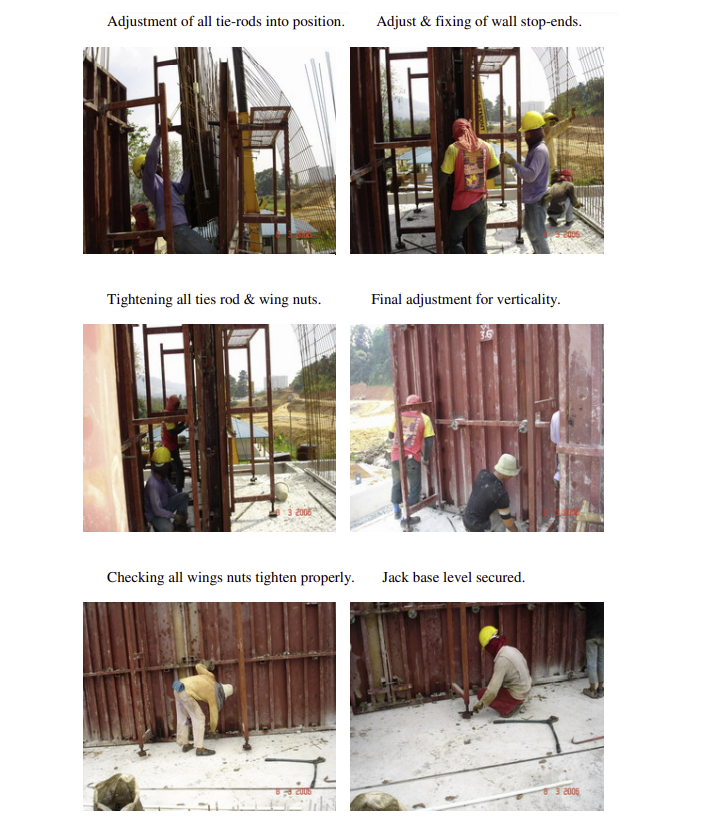
Perform the positioning & adjustment of wall panels.
Adjusting to be done using the screw jack to obtain the required level.

Complete the adjustment of all tie-rods into the position.
Adjust & fix the wall stop-ends.
Now tighten all ties rods and wing nuts.
Do the final adjustment for verticality.
Check all the wings nuts and tighten properly.
Secure the jack base level.
Tightening of the tie rod & wing nuts to be completed for wall panel stop ends.
Now the wall forms are ready for inspection and to be inspected.
Transfer the concrete from truck and complete the concreting work.
Dismantling of Shear Wall Formwork
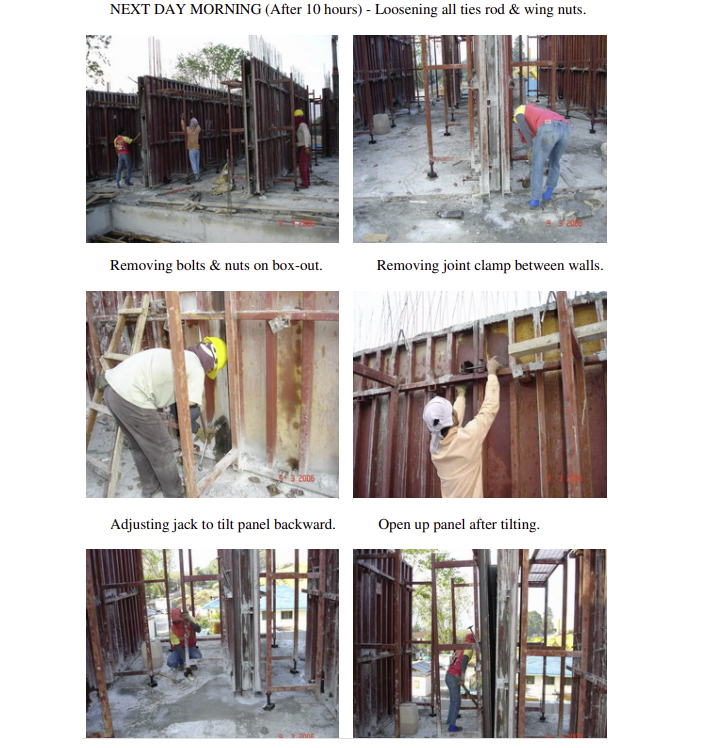
After concrete works on the next day or after at least 10 hours loosen all tie rods & wing nuts.
Remove bolts & nuts on box-out.
Remove the joint clamps between walls.
Adjust the jack to tilt panel backward.
Open up the panel after tilting.
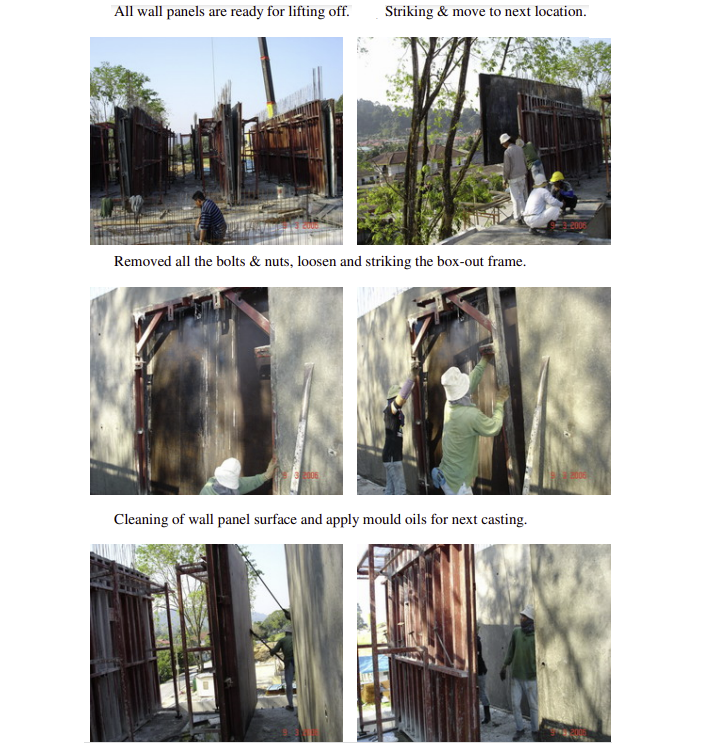
Now all wall panels are ready for lifting off.
Do the striking & move to next location.
Removed all the bolts & nuts, loosen and strike the box-out frame.
Cleaning of wall panel surface to be done and apply the mould oils for next casting.
Discover more from Method Statement Store
Subscribe to get the latest posts sent to your email.