The purpose of this civil work method statement is to outline and describe in detail the procedure such as setting and lay-out plan on actual location, laying of tiles, mixing of mortar tile grout, final laying of tiles and all other related activity.
This flooring tiles activity should be performed with strict compliance and implementation of project safety requirement, quality procedure and project specifications to complete the work both for floor and wall tiling works.
When materials are delivered. Check, examine marks and the condition of materials and components. Tile sizes, thickness and colors are as grouts are as specified and are suitable for the conditions to which the tiling will be used.
List of Mandatory Tools and Materials
Ceramic Tiles
Cement
Diamond Cutter/Tile Cutter
Levelling Machine/Spirit Levels
Tile Spacer/String
Scaffoldings
Measuring Tape
Steel Trowel
Plier
Other Tools
Method Statement for Installation of Tiles – Editable Download
Preparatory Requirements
Cleaning of completed floor slab and masonry wall prior for start survey marking and layout. Layout and put marking on the concrete floor slab the correct tile layout and make sure it is aligned with the markings on the masonry wall for tiles.
Provide temporary but rigid lumber for guide/references to check plumbed and alignment.
Do not begin tiling work until all concealed conduits, pipes, electrical cables, electrical boxes, etc. that penetrate the tiling have been fixed securely in position and making good is completed.
Also ensure that waterproofing for wet areas are already done including leak test before tile works.
Discard any tiles that are chipped or cracked.
Cut tiles neatly and accurately.
Health & Safety Requirements
All works shall comply with safety procedure or instruction as set out in project safety plan rules and regulations.
Urban Safety Personnel will be on site during works.
Qualified and skilled workers should be assign to the installation.
All field personnel shall be required to wear their PPE.
Preparatory meeting should be conducted before start the work.
Provide lighting when work at night.
Provide scaffolding when working at heights.
| JOB STEP | POTENTIAL HAZARD | PREVENTIVE MEASURE | |
|
1 |
Preparatory-tool box meeting | Ensure that all persons taking part in the activity are inducted and trained for the activity.
Conduct tool box meeting before starting the activity Check used tools and equipment |
|
|
2 |
Installation & Cutting of tiles | Eye Injuries
Hand Injuries Cuts/Lacerations Sharp/sheared tiles ends |
Wear proper PPE
Wear gloves and goggles |
|
3 |
Work at Height | Trips/Falls | Use proper scaffolding and platforms |
Procedure for Floor Tiling Works
Establish a datum level for finished floor.
Clean the floor slab remove/chip harden mortar or concrete. All area of slab should be at the required level.
After cleaning the slab mix a cement slurry and pour at the area where the installation occurs before the mortar bedding.
Follow the approved drawing where the first tiles location installed, first tiles should be the guide for installation.
When the mortar bedding (1:6.5) is in the proper level install/fix the tiles.
Apply thin set mortar on the tiles in thickness 3-4 mm.
Set the tile with thin set mortar onto the bedding mortar and used rubber or plastic hammer to push up to the correct level and correct location.
Tiles must be correctly positioned at the time they are placed and laid with joints.
Use 2mm pvc tiles spacers to keep the joint of each tiles.
Control the overall level of the finished floor by means of a spot check levels.
Provide 1% slope going to floor drain (areas with floor drain).
Set out the tiling width joints of consistent width, ensuring they are horizontal and parallel.
Cleaning the tiles from dirty cement or mortar.
Remove all the pvc spacer before grouting.
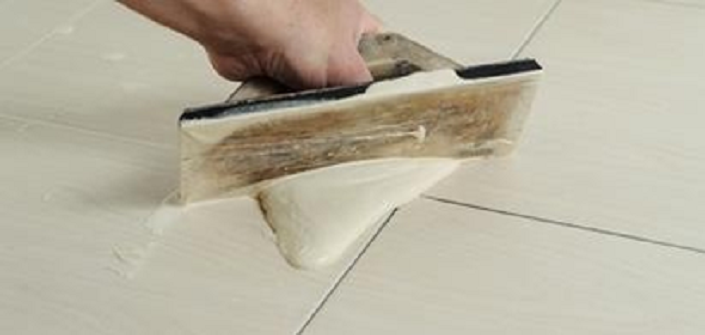
Use the approved grout and apply the grout in every joint smooth, level and clean application.
Method Statement for Installation of Tiles – Editable Download
Wall Tiles Installation Works
Provide a rough wall finish of plastering prior to receive wall tiles.
Establish datum line should be parallel and align with the floor layout.
Tile layout plan shall be made in accordance with the approved shop drawing. Reference line has to be shown by nylon string.
Colour tone, distortion, size shall be checked and sorted out before preparing tile and areas of use shall be in accordance with the approved drawing/tile list in each room.
Apply thin set mortar in thickness of 3-4mm on the tiles.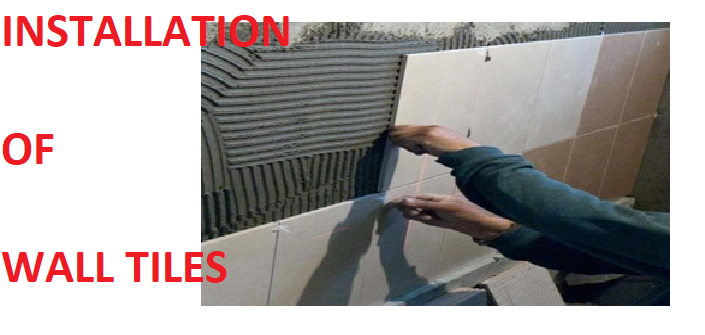
Use wooden or plastic hammer to push up the tile to the correct level and correct location.
To achieve uniform joint use 3mm pvc tile spacer to separate the tiles by 3mm gap.
Cleaning the tiles from dirty cement or mortar.
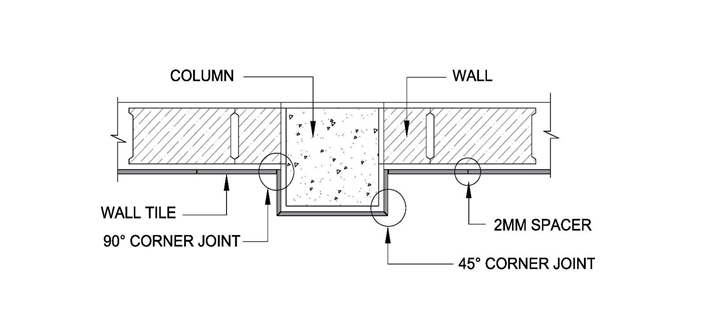
Tile Outer Corner Wall Joint Installation
Remove all the pvc spacer before grouting.
Use the approved grout and apply the grout in every joint smooth, level and clean application.
Apply only the approved grout for each area.
Cut and fit tiling neatly around pipes, electrical boxes, etc.
Damage, hollow surface installed tiles should be remove and replaced.
Protection and Cleaning of Tiling Works
Do not permit any traffic at all on the floor after completion.
Provide adequate protection if heavy loads are to be moved across the flooring.
Brush off loose materials, wash with clean water and remove surplus water with cloth.
Treat with an appropriate acid cleaner in accordance with the manufacturer’s instructions.
Before applying the cleaning agent, wet the floor and remove any surplus water; after cleaning rinse it thoroughly with clean water.
Inspection Checklist for Tiling Works
Checks Before Installation
- Check setting out and surface preparation
- Clean, Free of any debris, dust, oil, grease, etc.
- All pipes sleeved sealed (grouted)
- Waterproofing applied and tested
- Services within walls & floors have been tested & approved
- Starting tile
- Tile spacer
- Protection (for existing finished materials)
Check After Installation
- Level
- Layout
- Alignment
- Tiles approved pattern (if any)
- Consistent joint/gap
- Hollow sound (tolerance for hollow sound tiles is 15% of the total area of single tiles)
- Slope going to drain
- No defective tiles was been installed
- Grouting application is even, smooth & level
- Proper cutting of tiles. No chipped or broken edges
- Protection for the installed tiles (esp. floor tiles)
- Housekeeping
Method Statement for Installation of Tiles – Editable Download
Discover more from Method Statement Store
Subscribe to get the latest posts sent to your email.