
The purpose of this method statement is to ensure that decorative plaster work and related activities are executed safely and in accordance with the contract requirements and that all quality assurance / control activities are conducted in a systematic manner, works are inspected and conformance is verified and documented.
Project Manager shall be responsible for the overall implementation of this procedure.
Construction Manager along with Site Engineer / Site supervisor / Surveyor/ Foreman shall ensure that plastering works are carried out as per specification, drawings and method statement.
QA/QC Manager along with QC Engineer shall ensure that works are carried out as per project’s requirements. He is responsible for the implementation of related QA/QC works as detailed in Quality procedure and Quality plan for plastering works. He shall also coordinate with the site laboratory for testing of materials related to plaster works.
HSE Manager along with safety officer shall ensure implementation of all safety procedure, safety measures related to the nature of works being carried out and in accordance to the HSE Plan.
The equipment’s required for decorative plastering works are listed below.
- Hilti Gun
- Spray Plaster Machine of Conmix
- Hand Sprayers
- Hand tools of Trowel, floats, Aluminum section etc.
Sequence of Work for Decorative Plaster
Setting Out
Wall surface to be plaster shall be set out by using string lines to give a nominal thickness of 18mm.
The string lines are to be used to make plaster pad, level pads with same system and material as listed below as level indicators when applying the spray coat.
Angle beads and stop beads shall be installed in plumb and set according to the thickness of the finish wall.
Angle beads shall be placed before the second coat is applied and stop bead shall be place and fixed to the wall.
Surface Preparation
Necessary surface preparation shall be done by the main contractor.
Excess concrete, loose particles on walls and ceiling shall be removed by grinding or chipping.
Cracks, holes and honeycomb shall be filled in with approved cement plaster or approved equivalent material.
Metal Accessories Installation
Fiber Glass Mesh/Expanded metal lath (as approved by the consultant) to be fixed at all junctions of dissimilar backgrounds (i.e. fair-faced concrete and block work).
Angle beads shall be installed in plumb and set according to thickness of the finish wall, refer to plastering thickness specifications.
Stop beads shall be placed in all door openings; window openings and end of the plaster work terminated to the slab soffit.
Corner beads shall be placed and fixed to the block work directly.
Apply spot guides or guidelines to achieve a level surface after the 1st coat of the bonding rush coat.
Groves and expansion joints as and where required shall be used as plaster accessories.
Summary of application
| Coat | Description | AAC Blocks | CMU Blocks and concrete surface |
| 1 st Coat | Bonding Rush Coat | Bonding Rush Coat- BRC LGT | Bonding Rush Coat- BRC |
| 2nd Coat | Intermediate coat | Cement Plaster-CP2 LGT | Cement Plaster-CP2 |
| 3rd Coat | Final Coat | SP2 Conwave | |
1st Coat- Bonding Rush Coat
Concrete surface:
Apply bonding key coat, rush coat on the concrete surface.
Commix concrete rush coat BRC mixed with an appropriate amount of potable water (approx. 19%by weight i.e. 9.50 liters. Per 50kg bag) using a mechanical mixer should be spray applied on the prepared fair faced concrete surface at an average thickness of 2-3mm.
Autoclave aerated concrete blocks (AAC):
Conmix-BRC LGT mixed with an appropriate amount of potable water (approx. 17%by weight i.e. 8.50 liters. Per 50kg bag) using a mechanical mixer should be spray applied on the autoclave aerated concrete blocks.
A rough texture has to be obtained (approx. 4-6 mm thick) to provide a mechanical key for the subsequent coat of SP2 Conwave.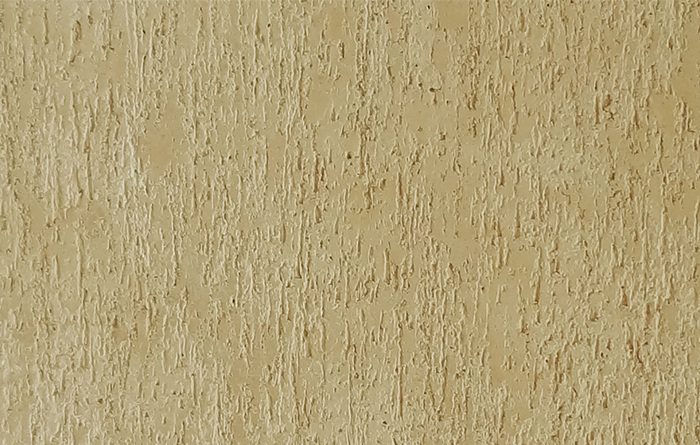

Curing the applied bonding rush coat BRC-LGT and BRC by water for a period of 2 days (3/4 times daily).
2nd Coat or intermediate coat by CP2
Mixing
CP2 and CP2-LGT supplied in 50 kg bags has to be mixed with potable water only, in a clean plastic bucket or a clean non-corrosive, uncontaminated metal tub. To ensure a homogenous and uniform mix, an electric agitator must be used.
The amount of water to be added is 8.5 litres per 50 kg bag (i.e. approximately 17% by weight). Add CP2 to water, turn the contents of the bag carefully and stir frequently.
Once mixed, allow to stand for 5 minutes and mix again before applying.
No further water should be added to the mix.
Hard and set plaster should not be re-mixed or used.
If a plaster spray machine is used, the mixing is carried out automatically.
Application
With the second / final coat application, a total thickness of up to 20 mm can be built up and finished by felting or floating.
If a plaster spray machine is used, then the plaster is applied in a continuous operation and finished manually to the specified thickness
The finished plaster has to be water cured for a period of 2 days (3-4 times daily).
3rd Coat or Final Coat SP2 Conwave
Mixing
SP2 Conwave is supplied in 50 kg bags must be mixed with potable water only, in a clean plastic bucket or a clean, non-corrosive, uncontaminated metal tub.
To ensure a homogeneous and uniform mix, an electric agitator must be used.
The amount of water to be added is 7.50 liters per 50 kg bag (i.e. approx. 15% by weight). Add the SCP to water, turn the contents of the bag carefully and stir frequently.
Amount of water added and mixing time should be constant for every bag to avoid color variation in the finished product.
Once mixed allow to stand for 5 minutes and mix.
Hard and set plaster should not be remixed.
Application
SP2 Conwave mixed as above is applied in a single coat onto the prepared background to a thickness of maximum 18 mm and is levelled by means of steel trowel.
Once the material has been applied, care should be taken to ensure that the surface area is closed equally.
After approximately 2.5-3 hours (depending on ambient conditions), when the plaster is still “green” (i.e. when one touches it, the finger does not penetrate easily into the plaster).
Finish colored: As per Engineer Approved single color
HEALTH, SAFETY AND ENVIRONMENT
Provide warning signs to protect the newly plastered walls.
Protect from damaging all edges of the openings by installing protective devices.
Protect all the finished walls.
ATTACHMENTS
- Inspection Checklists
- Inspection Test Plan
- Risk Assessment
- Technical Data sheet (TDS)
- Material Safety Data Sheet (MSDS)